


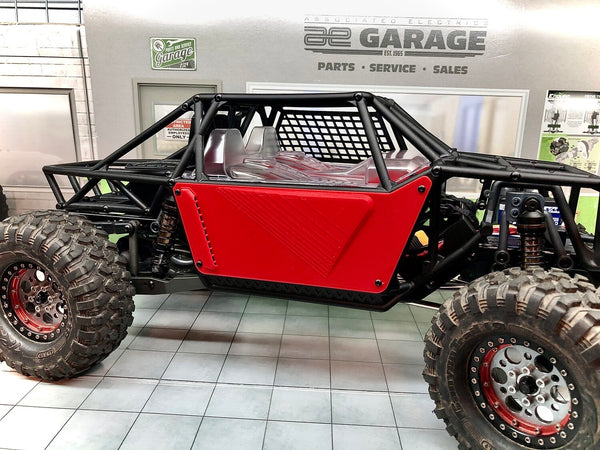


This is a printed set of Body Panels for the Element Gatekeeper.
IMPORTANT: The panels come unformed. You must heat from the front ridge of the roof, sides of the hood and nose of the hood. You can use a Hair dryer on low or a small hobby head gun to get the job done. Wear thin canvas gloves when forming the panel to prevent from burning yourself.
DO NOT OVER HEAT OR THE PANEL WILL SAG IN THE WRONG PLACES. ONLY HEAD ONE PORTION AT A TIME.
Roof Forming: Secure the roof in place with screws first then gently head the front and bend and hold with your gloved fingers while it cools.
Hood Forming: Secure the front of the hood first. Once the front is secured, gently head the nose and bend like the roof. Once the nose is formed, gently warm the area near the cab screw holes to form the hood and allow the screw holes to dip down. You may start the cab side screws first but do not fully tighten until the hood is cool from forming.
IMPORTANT READ:
IF A COLOR OS NOT SPECIFIED, YOUR ORDER WILL BE CYCLED TO THE BACK OF THE Q UNTIL I HEAR FROM YOU FOR YOUR COLOR SELECTION
You are selecting the Backing (Color of the back of the Bed Side Insert) and the Surface (Color of the part you see from the side of the truck. Look at the renderings for color example.
To install the Bed components, you must do it in the following order. 1) Remove the radiator, 2) Slip the bed sides between the fuel cell and the cage (It's a Snug Fit But It will Go), 3) Slide in and glue (Shoe Goo/E-6000/Hot Glue) the bed bottom to the side inserts(From Underneath), 4) Install the bed cap and glue or fasten with Zip Ties, 5) Glue/Zip sail panel in place. Use 2x M3 studs (Not Provided) and nitro fuel tube (Not Provided) to mock fuel fill. 6) Install the Radiator
Note: Zip Ties Must be Small (1.4x2.5mm Opening)
Due to the nature of 3D printing, items may contain tiny visual blemishes. Items may require some trimming and painting for optimal visual appeal/fit; similar to what you would expect to do with model parts.
IMPORTANT: Do not use power drivers on 3D printed parts. Over tightening printed parts and cause premature cracking and crushing. Always ensure you hardware will not bottom out in the screw pocket. This can also cause at 3D printed part to break prematurely.
Printed Parts - These parts will be printed in Black (Unless otherwise requested) using advances slicing methods for maximum strength. All 3D printed parts come with a lifetime replacement guarantee. If you break a part, simply send us a photo and your order number. The photo is simply to evaluate for common issues and help identify potential improvements to existing designs.
